The Zephyr Test Distribution Report is a useful gadget that identifies how work is distributed amongst components or testers. The test distribution report is a bar chart that can be grouped by component or user. In this lesson, we will discuss how to set up the Test Distribution Gadget by Zephyr.
How to set up Zephyr Test Distribution Report
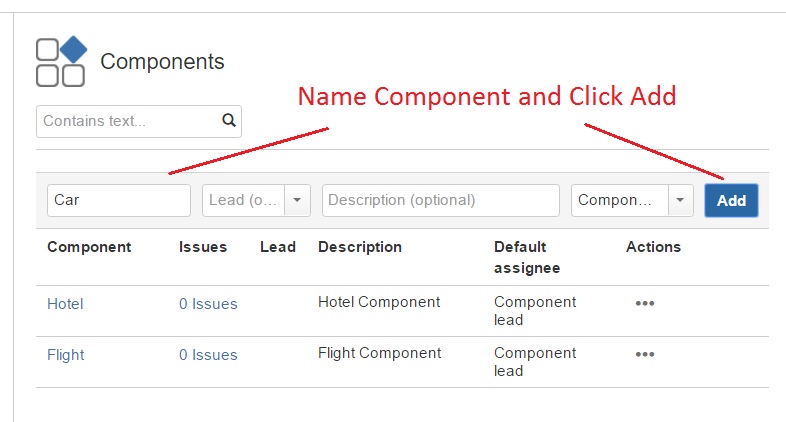
Step 1 How to add a Component in Zephyr
If you have components already set up go to step 2. By default, there will be no components when you first install Zephyr, so you have to add them depending on the application you are testing. Since this demo is a travel site like Expedia, I am going to add three components: Flights, Hotels, and Cars.
Click on Projects
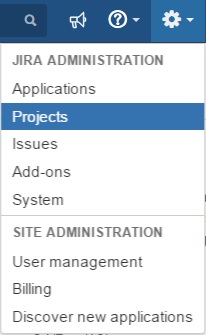
Click on Project Name.In this case, our project name is called demo.

Click on Components

Add Components
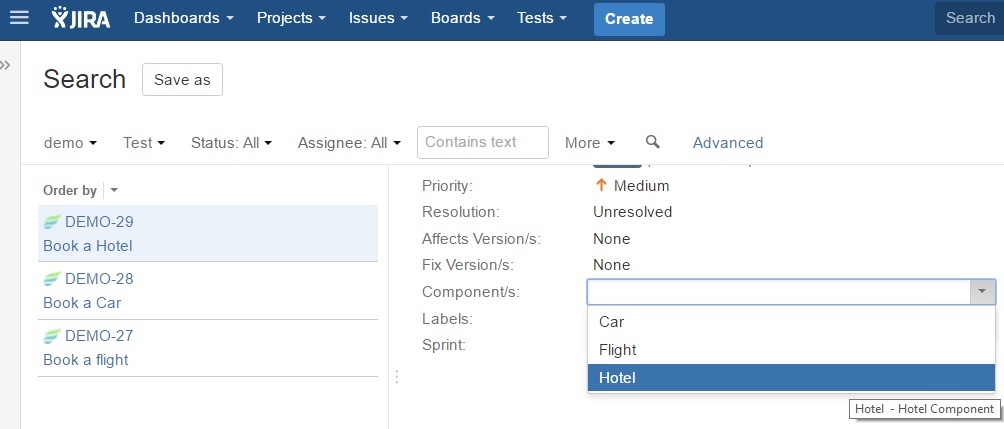
Step 2 Add Components to Test
The next step is to add the component name to the test case. Here I am opening my test case and looking for the field components. I then select the component and assign it to a test case. In this example, I am adding “Hotel” component to the Book a Hotel test case.
Step 3 Add Gadget
Next, go to the dashboard you want to add the gadget to or add a new dashboard.

In order to get a list off all the reports click on Add Gadget.
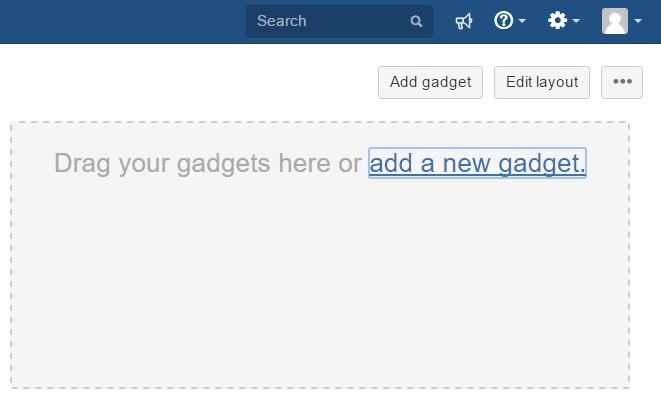
Click on Test Distribution and you will see the gadget added to your dashboard.

Step 4 Configure Report
There are two test distribution reports I will add: one by component, and one by user.
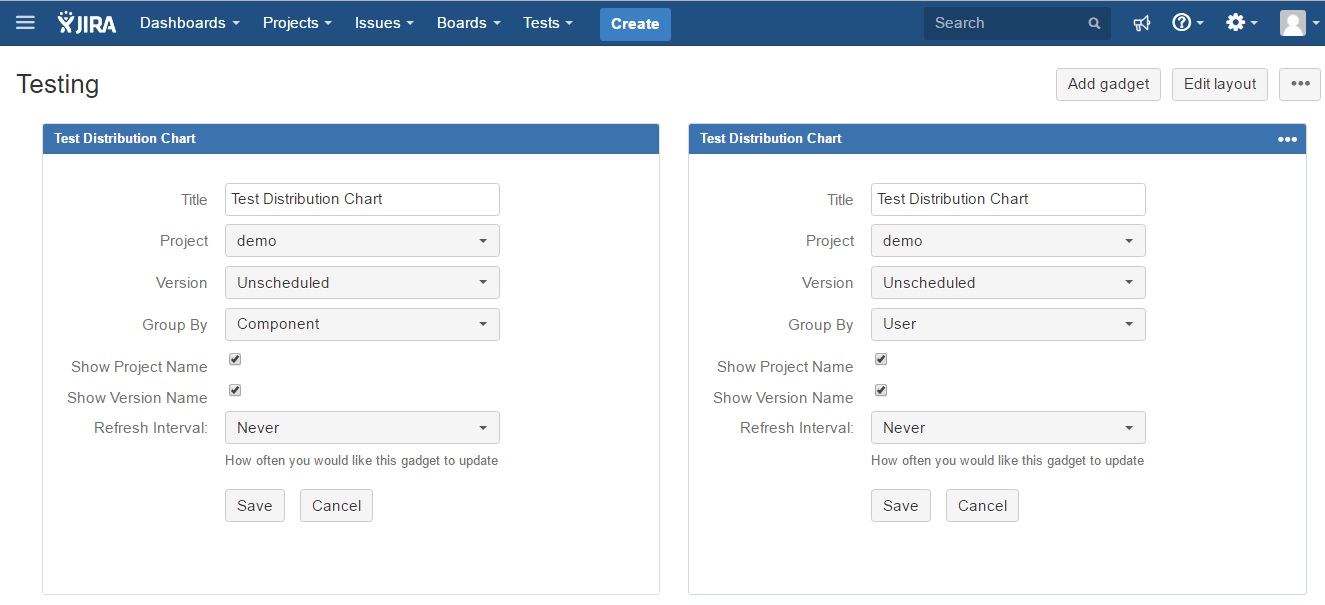
Note the test distribution by user is by test reporter (who created the report) and not who the test is assigned to.
Step 5 View Report
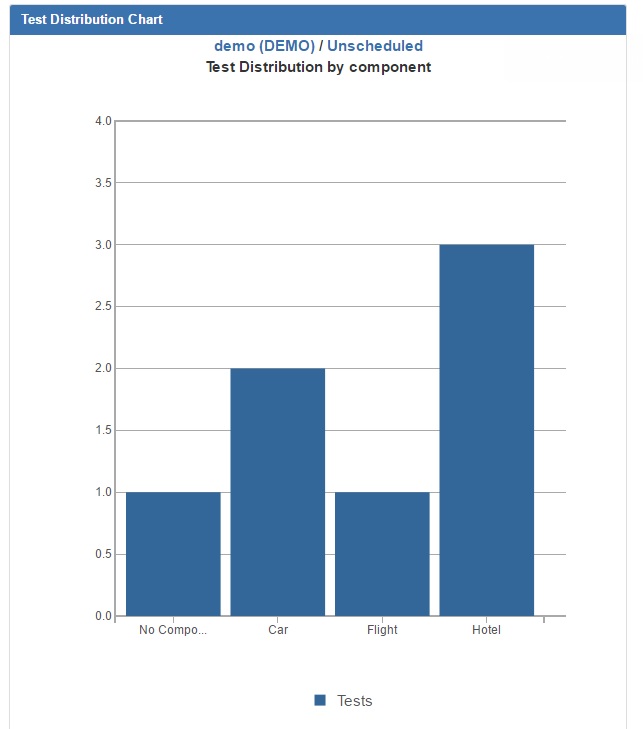
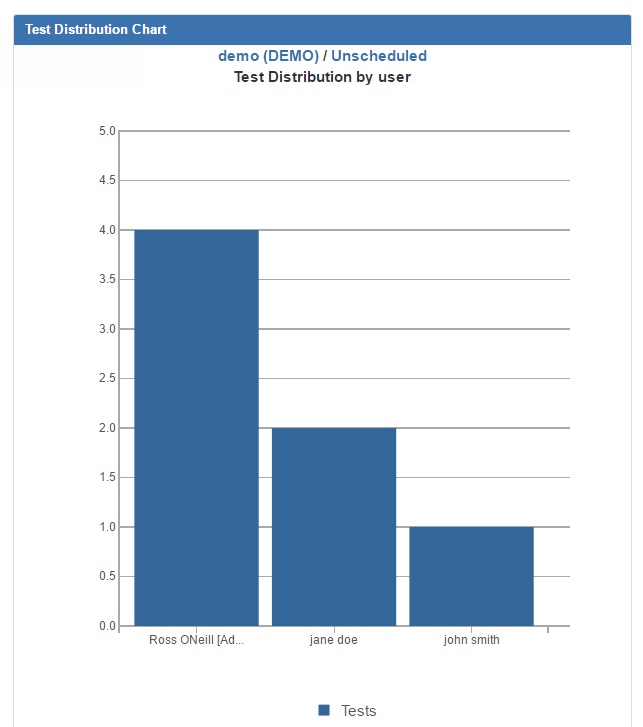
See Also