There is nothing more frustrating than having one defect block several test cases from executing. To address this issue, Zephyr has a great report to show the top defects impacting testing. Here we will learn how to create the top defects impacting testing report.
How to Implement Zephyr Top Defects Impacting Testing Gadget
Prerequisites: Before we begin to learn how to implement Zephyr Top Defects Impacting Testing Report, we need test cases and defects. In this example, we are creating several test cases for a popular travel website. To learn how to create and execute tests see: How to Create Tests and How to Execute Tests using Zephyr
Step 1 Test Execution
The first step is to execute the test cases. Simply click the Tests Menu Option and Plan Test Cycle. Notice I have already placed several test cases in the “ad hoc” test cycle. Next, I press the execute button.

Step 2 Enter Defects
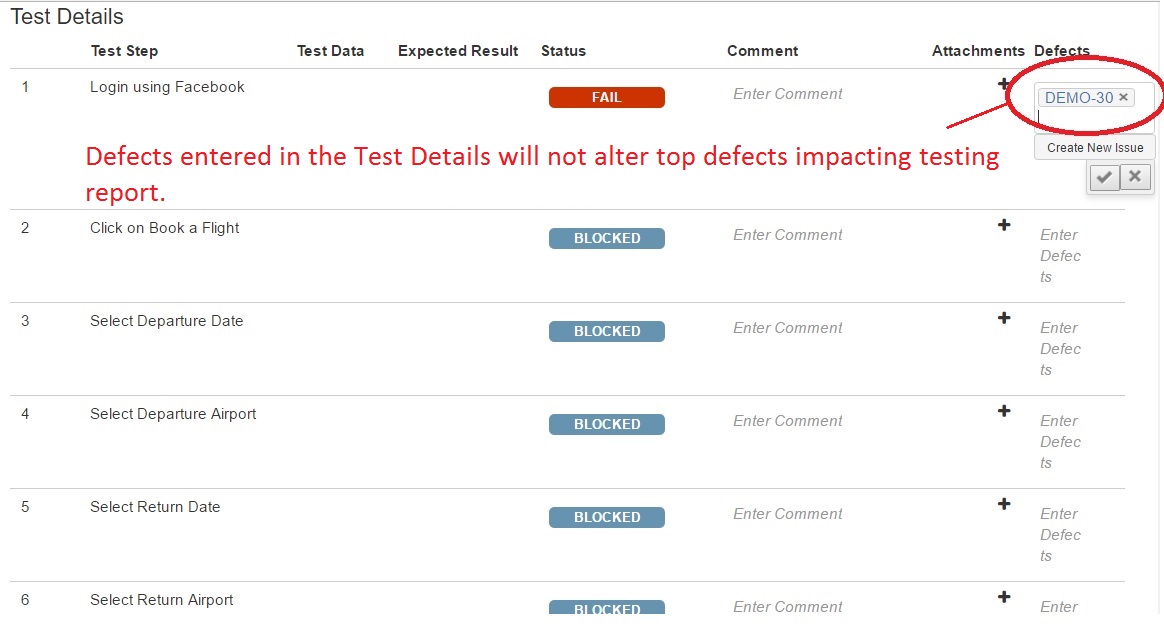
When you press the execute button you will be redirected to a different screen. Here is where you can execute tests, and pass or fail individual test steps. In this example, we will run Book a flight test case. Notice in the top portion of the test execution you can see an area where you can enter defects. In the example below, I am entering in defect “DEMO-30”. Note you can also enter defects on individual test steps, however, it will not change the top defect impact report.
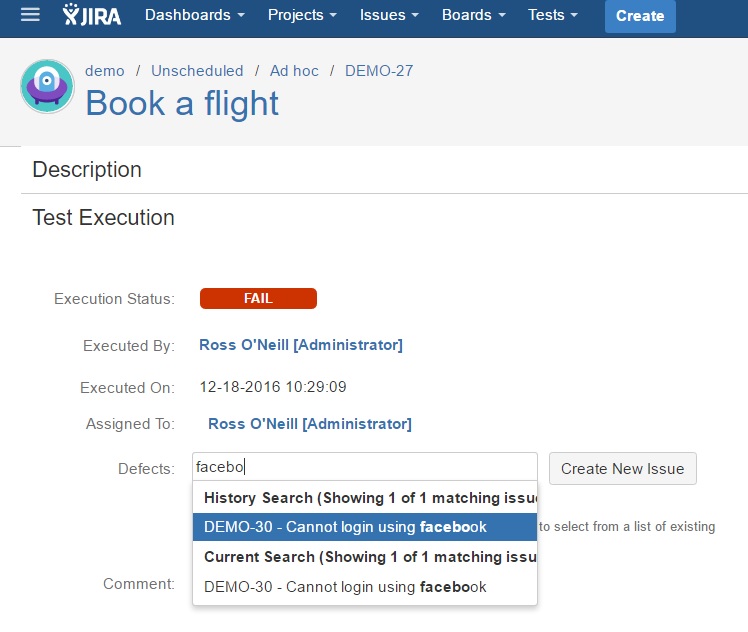
When executing a single test, the test case is broken into test execution (top portion), and test details (bottom portion). The test details portion is where you can pass individual test steps. In the test details, there is a field where you can link a defect to a step, however, the top defects impacting testing report will not be affected by this field. You must link your defect in the test execution portion.
Step 3 Add Gadget for Dashboard
Next, you need to create a dashboard if you have not done so already. I recommend you create a dashboard for your Quality Assurance Tasks. [To create a dashboard: Menu > View All Dashboards > Create Dashboard > Then add Zephyr Gadgets]
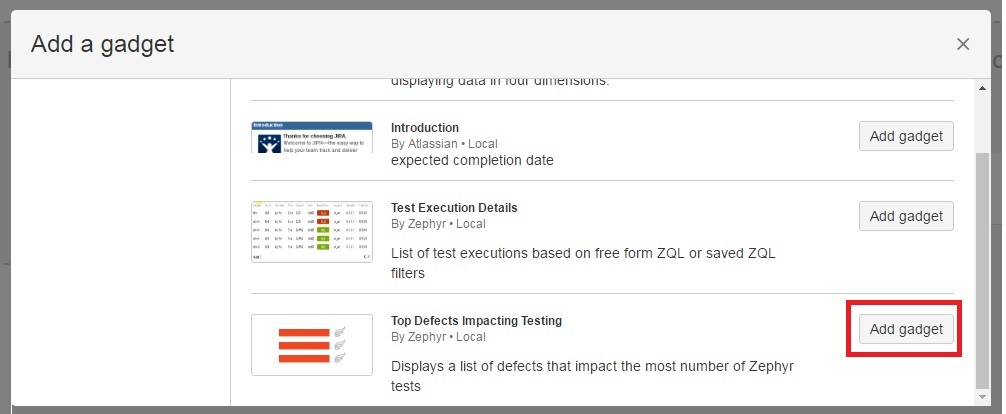
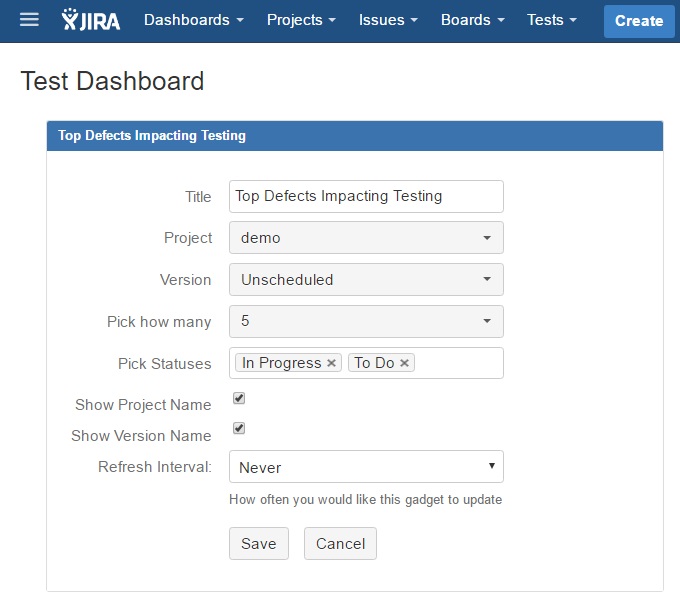
Step 4 Configure Report
Now the gadget has been added but we still need to configure the report. Note the defects I have logged do not have version assigned to them. Also note the statuses I have chosen are: In Progress and To Do.
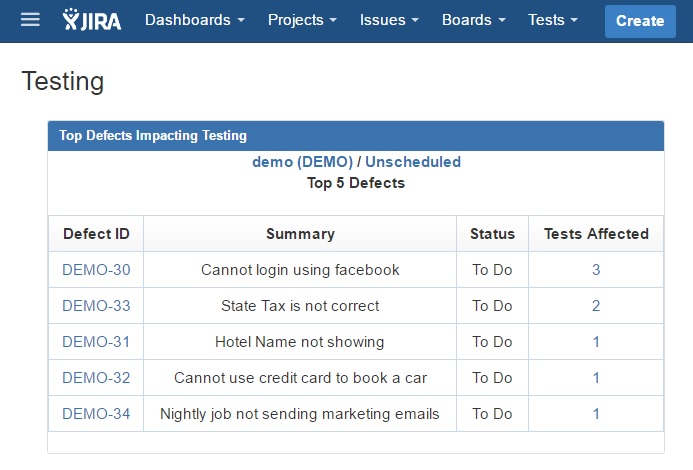
Step 5 View Report
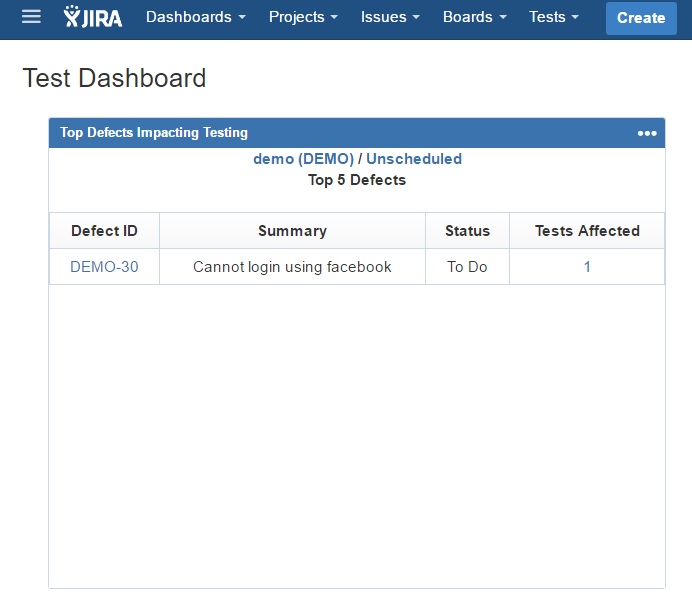
Conclusion
Now you know how to set up the Top Defects Impacting Testing Report. As more bugs and test cases are created the report will become more useful. In the report below we can see testing productivity will increase if defect DEMO-30 is addressed first.