
Zephyr is a test management plugin for Jira. Jira is a great tool to manage projects, however, it lacks a test management suite. A proper test management suite will have a place where you can create test cases, manage test executions, create and display reports, and demonstrate traceability among stories and defects. In this example, I will demonstrate how to install Zephyr. First, you will need a trial version of Jira. After that has been installed you can install the Zephyr plugin.
How to Install Zephyr for Jira
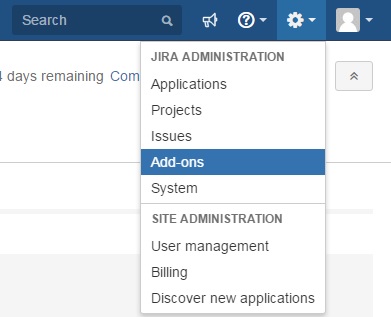
Click Add-ons
The first steps it to add Zephyr. Click on the wheel and click on Add-ons.
Search for Zephyr Plugin
Next, search for Zephyr plugin and click on the free trial button

Check for menu for Tests
If the plugin has successfully installed check it for Test. If you do not see Tests in the menu simply refresh your screen.

Add Issue Type
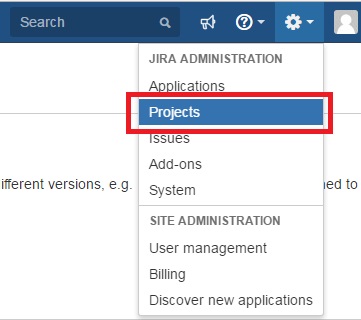
At this stage, you will not be able to create a test yet as you need to create an issue type of test. Currently, you only have issue types: Task, Sub-Task, Story, Bug, and Epic. To add an issue type test go to Administration > Projects
Click on the project you just created. In this example, I am adding it to “demo-qa”

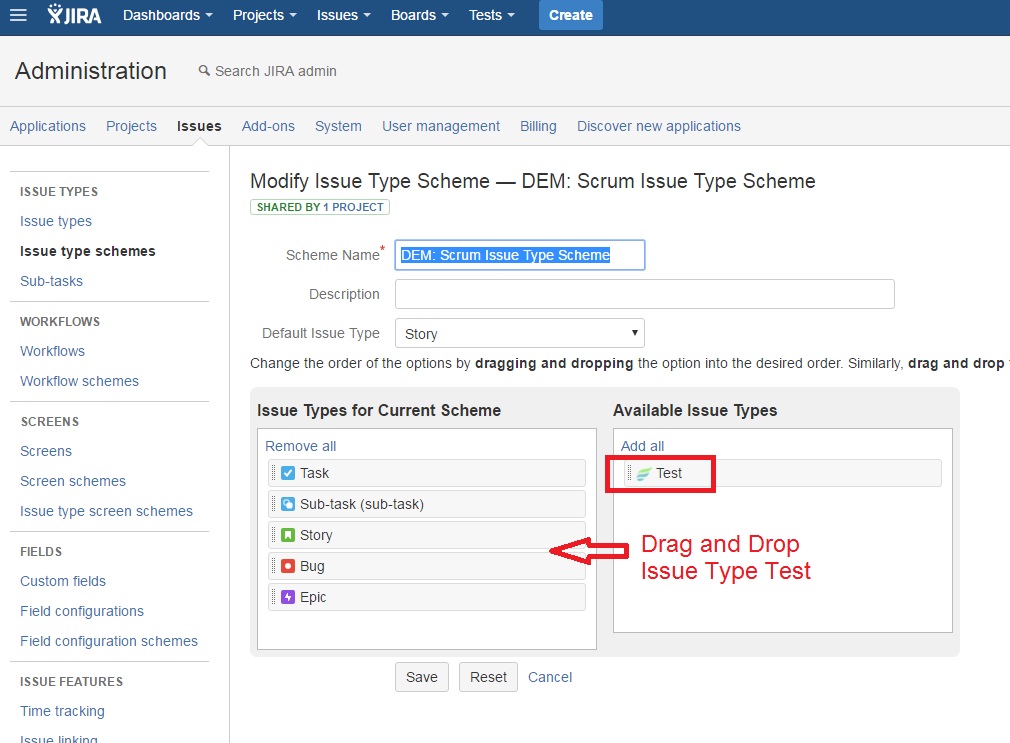
Issue Types Schemes
On the left-hand toolbar, there is an Issue Type Schemes button. Click on it to add a new issue type. Here you will drag and drop issue type Test into the box Issue Types for Current Scheme. When you are finished click on save.
Create a Test
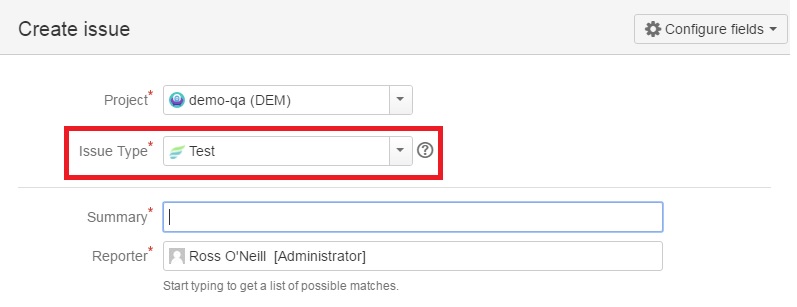
Now click on the Tests > Create and note you are now able to select issue type “Test”.
Now you have successfully installed Jira. The next step is to begin test planning by building test cases.