After you finish writing your test cases you will want to execute them. Since you will reuse your test cases you will need to put your test cases into a cycle. In Zephyr, test cases belong to a particular version. This version can have one or many cycles. In this post, we will describe how to execute a test using Zephyr by first creating a cycle then executing it.
How to Execute Tests with Zephyr
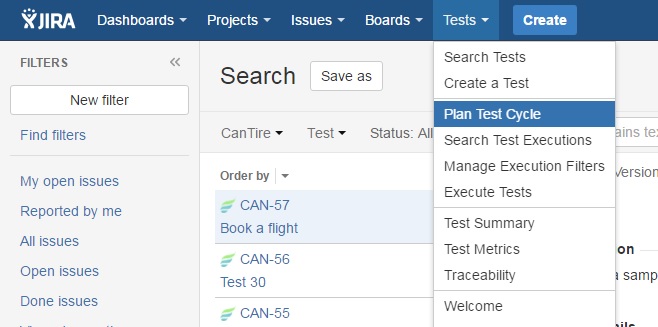
Plan a Test Cycle
Go to the main menu in Zephyr and select Tests > Plan a Test Cycle.
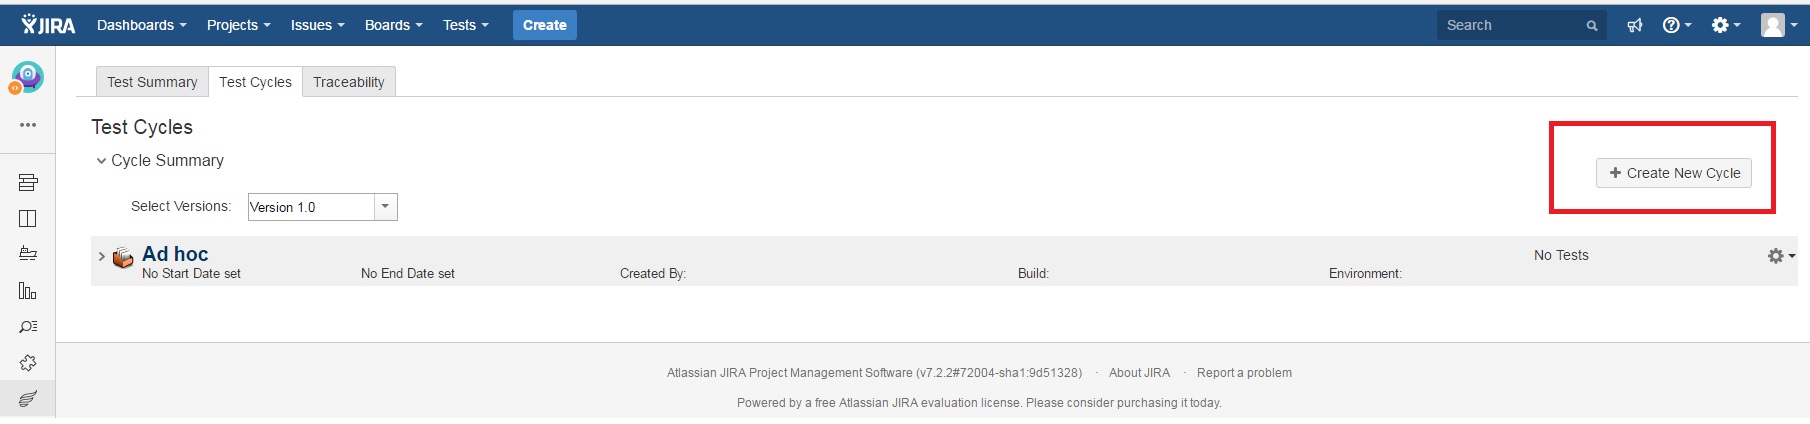
Create New Cycle
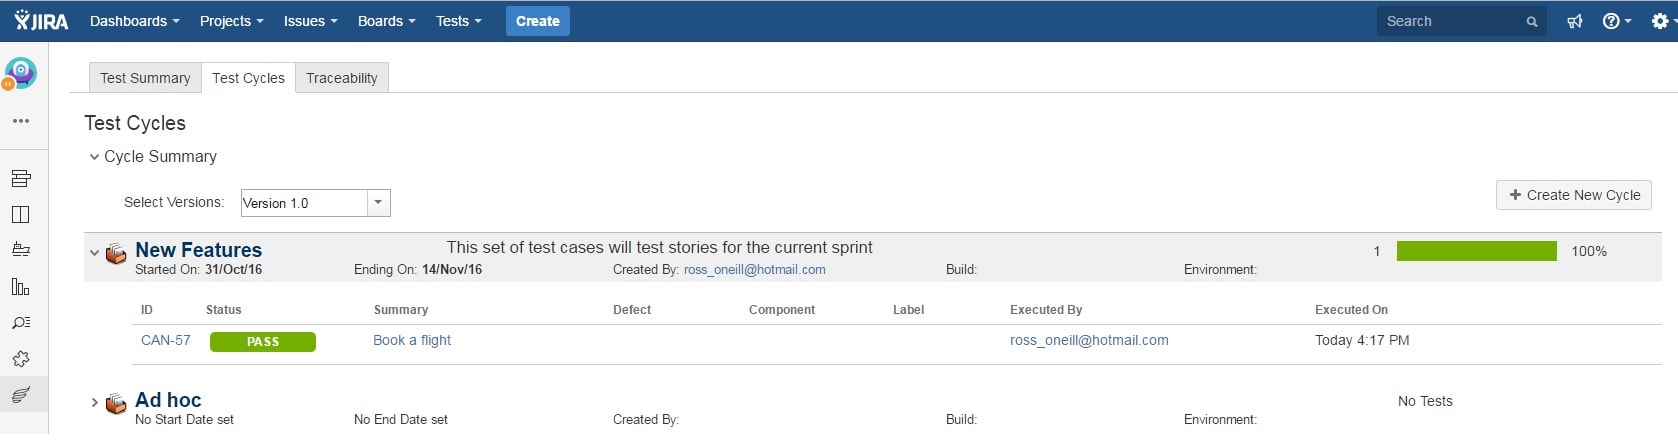
Next, we click on the “create new cycle”. Here we will call it New Features. Note how I selected version 1.0.
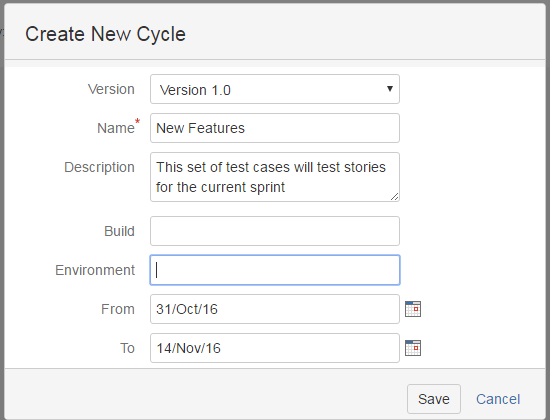
New Cycle Details
Note, how I created a cycle called New Features. I also will be testing these test cases in Version 1.0.
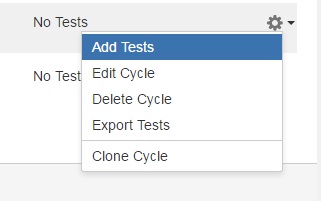
Add Tests to a Cycle
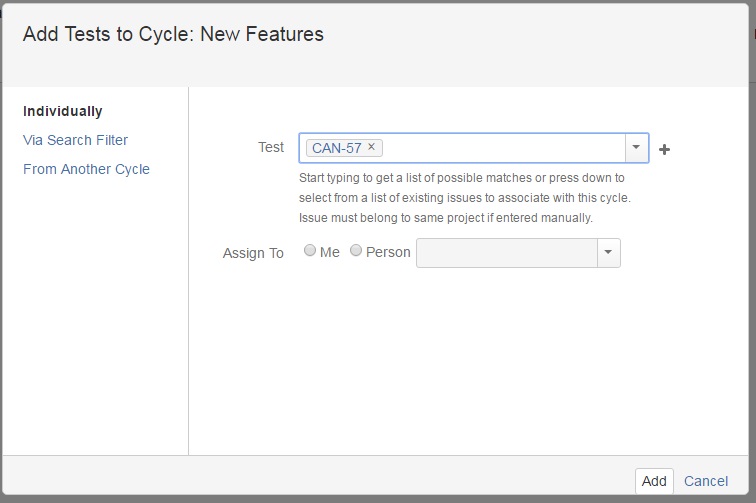
Select Tests
Here you can select one or many tests. When finished simply press the add button.
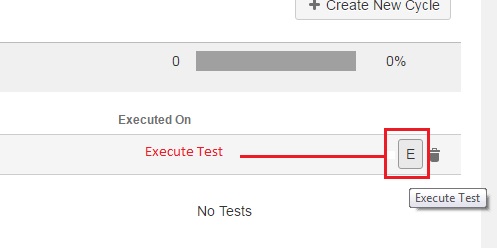
Click Execute
The execute button will take you to the test steps. Here you can select the following statuses: Unexecuted, Pass, Fail, WIP (Work in Progress), and Blocked.
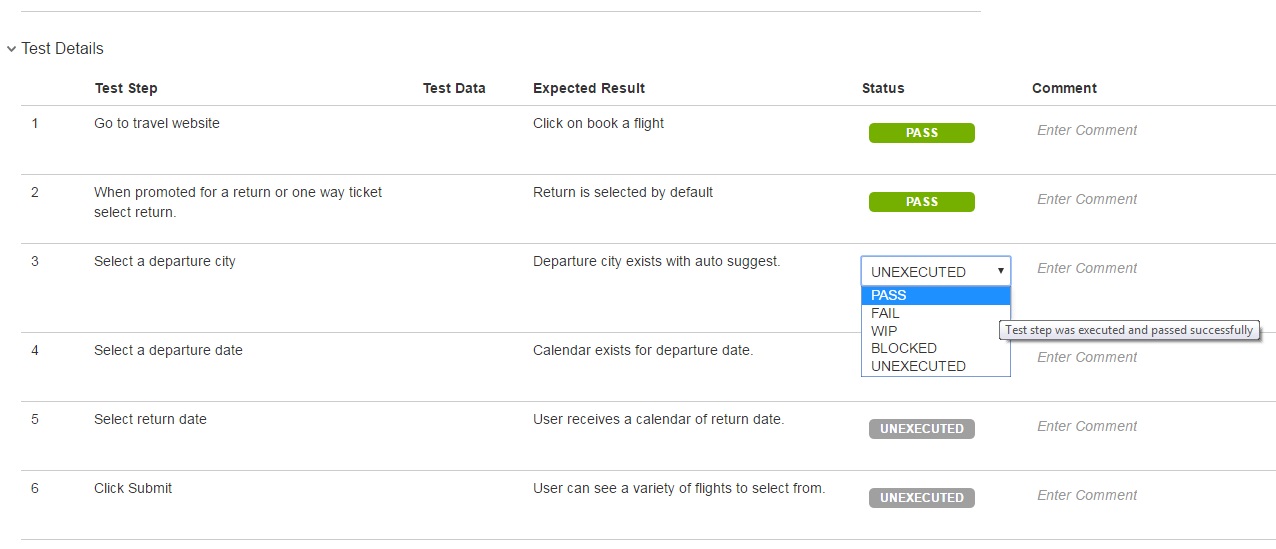
Execute Details
This is where you execute test steps individually.
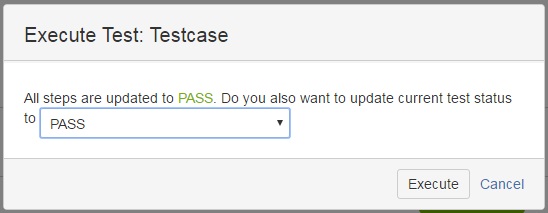
Update the overall status
Zephyr will display a popup to show the overall status
Click on Return to Test Cycle

View Overall Status of Cycle
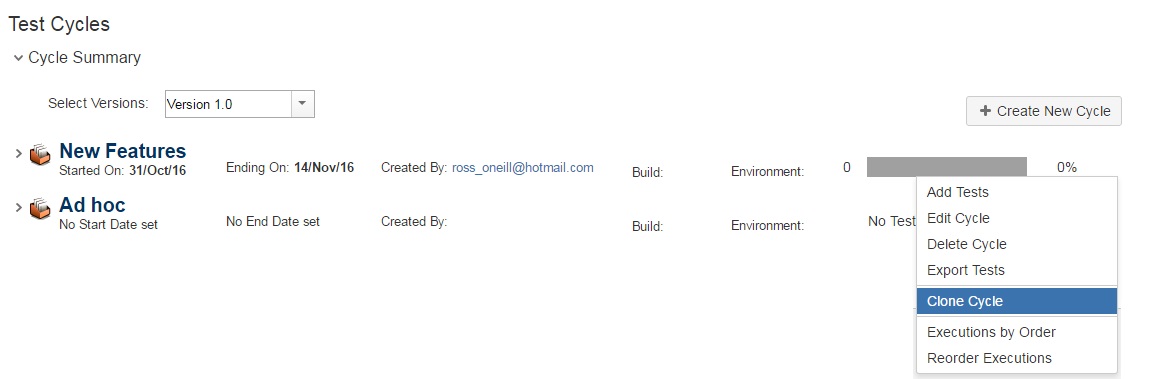
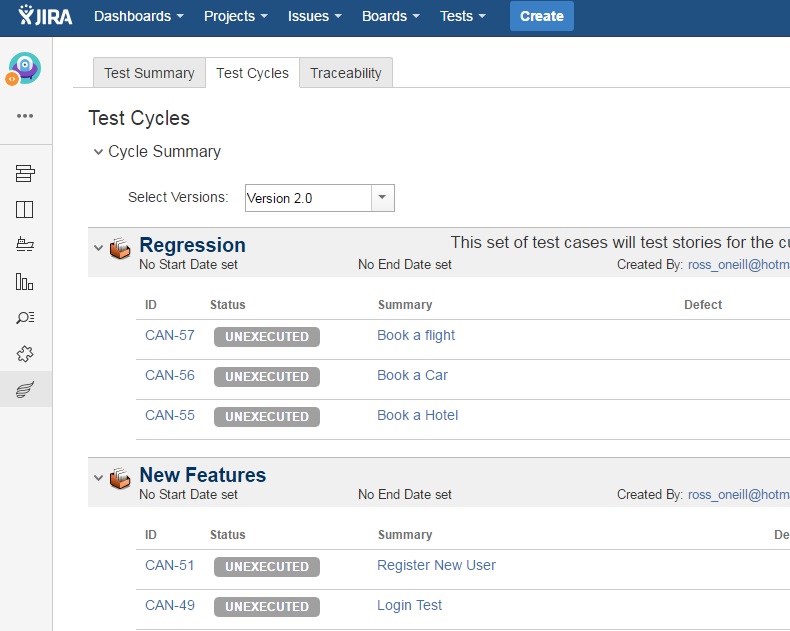
Regression
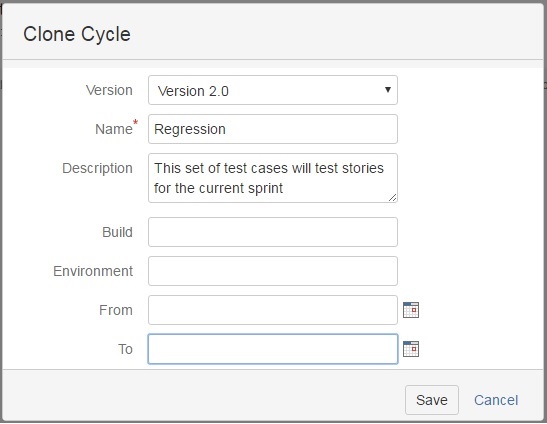
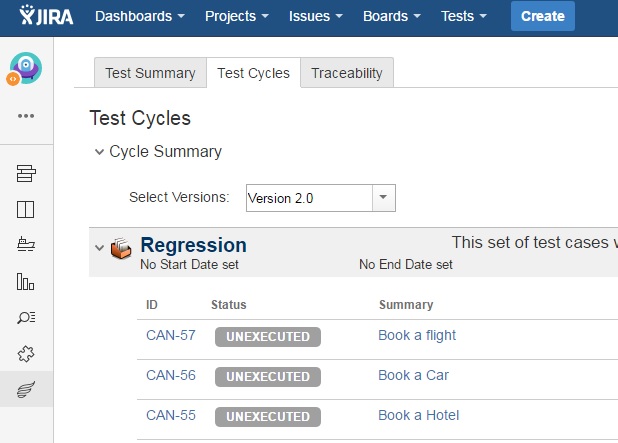
Over time you will build more and more test cases and you will want to put them in a Regression cycle. Zephyr allows you to clone previous test cycles so you don’t have to copy test cases every time. Suppose we have tested all the stories in version 1.0 and now Version 2.0 of the application has been released. The first thing we will do is take the New Features from version 1.0 and copy them to Regression cycle in Version 2.0.
Finally, you will create a new cycle in Version 2.0 called new features. Here you will put the current test cases to cover the current sprint.
Note in Version 3 you will need to merge the New Features from Version 2 cycle into the Regression Suite. Now you know how to execute test cases in Zephyr. Happy testing 🙂